Showing posts with label Stevia. Show all posts

Tuesday, April 12, 2011

If You're Thinking of Growing Stevia...

...I have a couple things to say.  First of all, for us, stevia (scroll to the bottom and read up) was extremely easy to grow (from plants), harvest, dry, crush and store.

What I've learned this past week through researching things further is that if you want to use stevia for baking, there are other (more processed) versions that produce better results.  "Green leaf stevia", which is what we grew and have dried, is best for using in drinks.  We discovered this when we added fresh stevia leaves to our mint leaves when making (cold) mint tea all summer- it was heaven.  It's also excellent when the dried leaves (either whole or crushed) are used in hot tea- also delicious.

But, what website after website that I came across said was that the green leaf stevia can be seen in baked dishes (small green flecks) and can even be tasted (a mild licorice taste that we haven't noticed in drinks).  Hm.

This left me a bit disappointed, but at the same time relieved that I didn't spend hours and ingredients trying to reinvent the stevia-in-baked-goods wheel.  I'm sure it's not impossible, but the more I thought about it, the more I realized that it's not going to be the same regardless.  If I'm going to decide to stop eating sweets (no one is saying that that's what I'm going to do), I think I'd rather just give it up all together than try to re-create something that I love, wasting time and ingredients, and then be disappointed.

Case in point:  Last year when I had given up sugar for Lent, I purchased some brown rice syrup.  The ingredients are organic brown rice and distilled water only.  It looks like caramel topping and tastes like Werther's candies.  I found a recipe for brownies that used no sugar- just brown rice syrup.  How did they turn out?  Well, they were dense, on the dry side and tasted kind of like very dark chocolate.  Topped with fresh homemade vanilla ice cream, they'd be just fine, but that would defeat the purpose, I suppose.  So, I'd prefer to go with out.


I did then come across these recipes (scroll down) using green leaf stevia, but I noted many were for drinks and the others just didn't appeal to me after my brownie experiment.

With documentaries coming out of the woodwork left and right telling us that what ails us is what we eat (like Forks Over Knives, thanks, Damian), the truth of the matter is that we (I) need to stop thinking that I can turn the bad stuff into good stuff and just get used to eating the good stuff.  Only.  Or mostly.  Or somewhere in between.

Easier said than done. 

In a nut shell, green leaf stevia is DIVINE for tea, both hot and cold and SO worth growing just for this purpose.  If you want to grow it for other purposes, do some research and weigh the benefits of trying to use it as a substitute.

It might be easier just to change the way you eat:-). Pin It

Tuesday, November 30, 2010

Phase Three

Phase One was planting and growing the stevia.

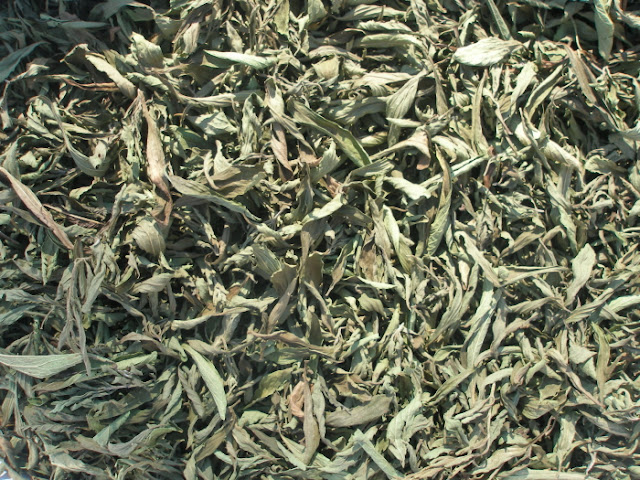
Phase Two was harvesting and drying the stevia.

Phase Three entailed stripping the leaves and pulverizing said leaves in my Kitchen Aid blender.  I had read that an herb grinder or coffee grinder works best.  I even had a friend's permission to borrow her coffee grinder.  But I thought I'd go ahead and try what I had on hand- my blender.  It worked well.  Probably not quite as well as a grinder would have, but I have no regrets.


I dumped the contents of the pulverized leaves from the blender into my fine sieve to catch any bigger pieces, then I put those back into the blender.  Overall, the result was a very fine powder (that I enjoyed inhaling and tasting each time I took the blender lid off) of stevia.


So far, I've only been using it in tea.  Less than an 1/8 of a teaspoon is plenty for a full mug of tea.  Stevia is potent.  I did find that using a tea strainer caught slightly larger granules.  While the sweetness of the stevia clearly permeated the tea, it likes to hang out on top of the water/tea.  I wasn't expecting it to float around up there, but it didn't cause any trouble, so I didn't mind.

Would you like to know how much stevia powder I ended up with after drying these 15 large plants?


One and 1/3 quart.  Yep, that's it.  It's good this stuff is potent. 


Phase Four:  Learning how to bake with it.  Look for the results of this phase sometime after my Christmas break.  According to my source, "You can also make your own liquid stevia extract by adding a cup of warm water to 1/4 cup of fresh, finely-crushed stevia leaves.  This mixture should set for 24 hours and then be refrigerated."  I haven't tried this yet, but may, depending on the recipes I find.

Until then, go ahead and add stevia to your garden plans for next year.  Any crop that you can plant in the spring and then pretty much ignore until the fall, hang to dry and spend only a couple hours processing is a keeper in my book.  A huge, added bonus is that this stuff is SWEET:-). Pin It

Tuesday, October 26, 2010

Stevia Harvest

Remember these little stevia plants?  There were 15.


They grew into these stevia plants over the summer, tolerating the dry conditions we experienced very well.


According to this website I've been gleaning information from, stevia should be harvested after the nights turn quite cold, but before a frost (although covering them during a frost is okay).  I was worried we wouldn't have them covered since our property often frosts when the local weather people predict it won't.


The stems of these plants were woody and I needed my pruning shears to cut them.  I then tied them in bunches and we hung them in the barn where they will be protected from frost, but still experience the cold (which is supposed to help set the sweetness) while they dry.


Once the leaves have dried, we'll move on to the next step of preparing the stevia leaves for use as a sugar substitute.  Stay tuned!


 Does anyone local have a coffee or herb grinder I can borrow? Pin It

Friday, July 2, 2010

Making Introductions (In Case You Haven't Met)

Let me make some introductions.  Stevia, this is a dear reader.  Dear reader, this is stevia.


If you ever come upon this sweet herb, pull off a leaf and eat it.  You'll be amazed at the sweetness.  Amazed.

Can you guess what I'm drinking right now as I type?  It doesn't seem like it should be such a big deal, but this is the first glass of mint tea that I've drank all summer and it is delicious.  I'm sort of a purest when it comes to what I drink, rarely drinking anything other than water.  Last summer, we made and I drank some mint tea, but then I cut out sugar (for Lent and beyond) and while I do succumb to sugary treats for special occasions (any special occasion currently), I cannot bring myself to put sugar in anything I drink.

Even before my sugar fast, we had decided we wanted to try to grow stevia this year.  We bought seeds and later found out through trial, error and reading that it is very hard to start stevia plants from seed (don't do it).  We bought 15 plants and into the garden they went.  They are about a foot tall, but will (hopefully) grow up to 30 inches.   Jamey has been making and drinking mint tea made with sugar, but I have been holding out until I had the time to figure out how to use stevia in my tea.  Whelp, I did it and I love it and the recipe is below.

We will harvest our stevia (then dry and pound it into a powder) in the fall.  We'll be following these instructions when the time comes. Until then, I will be making and drinking mint tea brewed with stevia.  This is huge for me.  Huge, I tell you.  What other drinks (other than juices, hot tea, and black coffee- which I do not like) are there out there that are purely natural, containing no sugar or artificial sweeteners?  There may be a few- but I bet I don't have all of the ingredients growing along side my house and in my garden.


Mint Tea Made with Fresh Stevia, A Concentrate (makes 1 pint concentrate, 2 quarts ready-to-drink tea)

This recipe is based on this recipe for mint tea concentrate, replacing the sugar with fresh stevia.

1 pint water
1/4 cup loosely packed fresh stevia leaves for a mildly sweet (perfect, if you ask me) tea OR pack a 1/4 cup of stevia leaves for a sweeter tea
1 1/2 cups packed mint tea leaves, rinsed well

Place water, stevia and tea leaves in a pot and bring to a boil.  Remove from heat and let steep overnight.  Remove leaves, using a sieve. This is your concentrate- you will end up with about a pint.  The concentrate can be frozen.

When you're ready to make tea, add 1 1/2 pints of water to 1/2 pint of concentrate to make 1 quart of tea.

Pin It
Related Posts with Thumbnails